Installing Netsody on Linux
This guide explains how to install Netsody on Linux. Netsody consists of two components:
- Netsody agent: background service
- Netsody UI: desktop application to manage the agent
You can install either the agent alone (headless setup) or both components.
We currently provide:
.debpackages for:- Ubuntu 22.04 (Jammy) and newer.
- Debian 12 (Bookworm) and newer.
.rpmpackages for:- Fedora 41 and newer (agent only, x86_64 only).
If you need to install Netsody on other platforms, you can contact us for assistance.
Installing the Netsody Agent
- Debian / Ubuntu
- Fedora
Step 1: Download the Agent Package
Choose your system architecture:
- x86_64
- ARM64
curl -LO https://download.netsody.io/binaries/0.1.0/linux-amd64/netsody_0.1.0_amd64.deb
curl -LO https://download.netsody.io/binaries/0.1.0/linux-arm64/netsody_0.1.0_arm64.deb
Step 2: Install the Package
- x86_64
- ARM64
sudo dpkg -i netsody_0.1.0_amd64.deb
sudo dpkg -i netsody_0.1.0_arm64.deb
After this, the agent runs as a background service.
Step 3: Configure authentication
Copy the authentication token to the current user's directory:
mkdir -p ~/.netsody
su -c "cat /etc/netsody/auth.token" > ~/.netsody/auth.token
chmod 600 ~/.netsody/auth.token
Fedora support is available for agent only and x86_64 architecture only. The UI is currently not available for Fedora.
Step 1: Download the Agent Package
curl -LO https://download.netsody.io/binaries/0.1.0/linux-amd64/netsody-0.1.0-1.x86_64.rpm
Step 2: Install the Package
sudo dnf install netsody-0.1.0-1.x86_64.rpm
Alternatively, you can use rpm:
sudo rpm -i netsody-0.1.0-1.x86_64.rpm
After this, the agent runs as a background service.
Step 3: Configure authentication
Copy the authentication token to the current user's directory:
mkdir -p ~/.netsody
su -c "cat /etc/netsody/auth.token" > ~/.netsody/auth.token
chmod 600 ~/.netsody/auth.token
Installing the Netsody UI (Desktop only)
- Debian / Ubuntu
Step 1: Download the UI Package
📦 netsody-ui_0.1.0_amd64.deb (UI is currently only available for x86_64)
Step 2: Install the Package
sudo dpkg -i netsody-ui_0.1.0_amd64.deb
Step 3: Start the Netsody UI
- Open your application launcher, search for "Netsody UI", and launch it.
- The UI icon will appear in your system tray.
On first startup, the UI may take a few seconds to connect to the agent while it completes the proof-of-work process.
Once connected, the public key of your device is displayed.
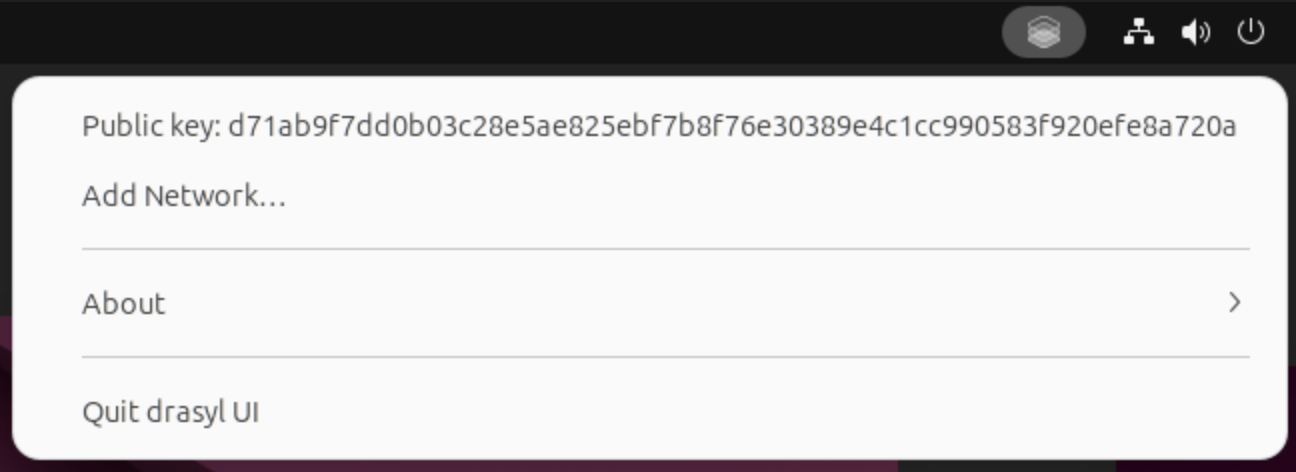
Figure 1: Linux system tray showing the Netsody UI application
You can copy your public key by clicking on it in the Netsody UI.
Alternatively, run netsody status in your terminal to display it.
Next Step
- ✅ Netsody is now installed.
- 👉 Proceed to set up your first network to start connecting devices.